Thursday 30 June 2011

Colour Me Crazy!

Let the World Spin by Irene Suchoki


Colour plays a huge part in all areas of my life; it always has. Whether it be for work as a stylist, as a designer or in my home life, there is certain to be a colour palette involved. In fact, I would go as far as to say it was something of an obsession - I have been known to reject seating in a restaurant that clashed with my outfit and I distinctly remember shunning The Brownie Guides uniform of brown and yellow; it would take way more than the enticement of a sewing badge to get me to wear that combination I can tell you!

I will leave it until another post to show you my studio space where all my fabrics, threads and yarns are colour coded; I could go on.. but I won't... you'll only think I'm odd

What I really wanted to show you was this video I came across recently for Dulux paints - you may have already seen it as I think it may have been used as a TV commercial


How gorgeous are those pink and lilac Indian archways?! The video mesmerised me and reminded me of when I was an art student and used to take one of every single Dulux colour chart from the local DIY store. Once I had the entire spectrum I would punch a hole in one end and secure them with a large paper fastener so that I could fan them out whenever I was working and check out colour combos for a project. Ah the simple pleasures in life!

I think it's time I spent a few happy hours playing on Colour Lovers again! Harmonious colour makes my heart sing. What does colour mean to you?

Lisa x

p.s if you can't see the video in your email version, come on over to the blog!

{Let the World Spin photo by Irene Suchoki visit her Etsy shop to see more of her gorgeous images, movie by let's colour project}

Thursday 23 June 2011

25 Things: Time for a De-Clutter in 3 Easy Steps

I've been working on an exercise called 25 Things; it's a methodical approach to removing some of the clutter that clogs up your environment. Yeah, you know the kind of stuff I mean.... the pens that ran out of ink, the out-of-date vouchers in your purse, the clothes in the back of the wardrobe that never get worn, the cables from equipment that is now defunct, your old mobile phone... you get the idea

If you're anything like me then you have a nasty habit of overlooking this stuff, it's just kind of always there; the brain manages to filter it out and you somehow just ignore it. Truth is, you don't. Deep in the back of your mind, your brain totally knows that the stuff is there and slowly over time it becomes a niggle. An irritation. A discontent

The fact of the matter is that a cluttered environment equals a cluttered brain. When all around you are unused, useless items that no longer serve a purpose for you then the knowledge of their presence rests uneasy in the back of your mind. And when your brain is clogged up being bothered by this useless stuff, it is less capable of focusing on the good stuff

"Clutter causes stress and clutter is one of the main barriers of productivity" - Charisse Ward

Everybody has a good clear-out every once in a while - it's therapeutic; it creates space. And I mean physically as well as mentally. Removing clutter from your environment also removes it from the backlog of niggles in your brain

The 25 Things exercise helps tackle this in a way that stops you feeling overwhelmed. Some of us have so much clutter that we just don't have a clue where to begin. Once brought back into our attention all we see is clutter and it's not pretty. Despite its overall benefits, de-cluttering can be a draining process and so 25 Things breaks it down into 3 easy steps. Each step can be done separately, a day apart. I did mine a week apart. If you're on fire with de-cluttering perhaps you'll manage all 3 steps in a day (but I'm guessing you're not the kind of person with huge clutter issues!)

So let's get started! Gimme some of that space!


Begin by finding 25 things that are totally useless to you or to anybody else. Broken stuff, dead stuff, worn out stuff. Chuck them out! (responsibly of course - recycle if you can!)


Next find 25 things you no longer want or use but that still have some value. List them on e-bay, in the local paper, have a yard sale or take a stand at a car-boot sale. Sell them! The best part about this step is that your clutter earns you a bit of money... and that's never a bad thing!


Finally, find 25 things that are no longer of any use to you but that you can give away to somebody who would have a use for them. Contact your friends, host a swap party, donate them to charity. Rescue them by putting them back into circulation so they regain their value as a useful item


This is an exercise that can be repeated whenever you feel the need; take it at your own pace, you'll know when your environment is better for it as it'll feel like a weight has been lifted from your shoulders. Suddenly the place will feel calmer, more ordered and there won't be anything for your brain to store in its 'must get round to sorting that later' file. There will be breathing space, you'll feel a sense of pleasure in your surroundings and best of all you'll feel a whole lot more productive

Let me know how you get on!

Lisa x

{graphics by Lisa Pocklington, 25 Things exercise via Rebecca Fine's A Certain Way newsletter}

Wednesday 15 June 2011

*Magpie* - Vintage Orangina Glasses


When I was a little girl, one of the highlights of a family holiday or school trip to France was that I could have the oh-so-exotique pleasure of Orangina. It seemed so much more glamorous than any British drink in the early 1980s, with its curvaceous bottle and its subtle fizz; not to mention that you had to tip it upside-down before opening to release the tiny, orangey bits! To me it was the epitomy of stylish French living - along with NafNaf and Chipie for the coolest of stationery (I would spend hours drooling over the ranges of fountain pens, ring binders and pencil tins... happy days!)

Orangina Posters by Bernard Villemot


I acquired this set of vintage Orangina glasses at a local vide grenier earlier this year - the kind old lady on the stall gifted them to me when I bought a big stack of vintage books, all fabulously faded shades of pistachio green, from her
 
I love the stylised 70s vibe. It reminds me of the classic British cartoon from the same era; Crystal Tips and Alistair. Do you remember it? It was all psychedelic colours and crazy hair


I'm still partial to a glass of Orangina even now... and woe betide the waiter who tries to fob me off with an inferior can of Fanta. Just sayin'

Lisa x

{photo by Lisa Pocklington featuring my actual french exercise book from school!}

Sunday 12 June 2011

Stripe Mania! Tutorial on making a cute top for summer... with stripes of course


eek two posts in one day!? Both are time sensitive so you'll just have to flow with me here peeps. I wanted to participate in Holly Becker's Stripe Mania! blogger extravaganza over on uber blog Decor8 but being me it involved a little more than just snapping a pic of myself wearing a stripey top (which was basically the criteria for the job!). I had grand plans of up-cycling two of my unloved vest tops into one cute new summer version and thought I'd share a tutorial on how to do it. It's super easy and you can be wearing it within a half hour! Yep, it's that simple

There comes a time in a girl's life when tops that skim the midriff are considered dangerous ground; I have reached that time. Not that I have a giant muffin-top (yet!) but I really do feel so much better in something that comes down a little lower. Are you with me on this? I have a small pile of such tops which I still think are lovely but would just never wear any more due to the length.. and so, in true up-cycle fashion, I decided to combine a couple of them into something a little more demure and sophisticated


You will need:
  • 2 tops that you still love but just don't ever get round to wearing - make sure that when combined they will provide the length you require (otherwise there's no point!)
  • scissors, pins, tape measure and sewing machine

1 Take the vest top that will become the bottom section of your new item and cut the across the width at the armholes


2 Take the vest top that will become the top section of your new item and measure down from the armpit for the desired length. Mine was 9cm as I wanted it to end just under the bust


3 Do this on both sides and then using the tape measure as a guide pin all the way across


4 Cut along the width approx 1.5cm below your pinned line. This gives you enough fabric for your seam allowance


5 Turn your new top section inside out and place it over the bottom section. Their right sides should be facing. Be sure to line up the side seams of both as well as the top edges and pin in place all the way around


6 Carefully sew the seam using whichever stitch your sewing machine recommends for stretch fabrics. Mine is called a triple elastic stitch. If you can't find this info in your manual then use a long and narrow zig-zag stitch so that the fabric can still move once sewn. Press the seams open and then turn right side out

Tip: use a ball point needle when sewing stretch fabrics on the sewing machine. This is a tip I tell all my sewing students in the Get Smitten creative workshops. It allows the needle to push through the gaps between fibres rather than piercing them and possibly damaging the elastic of the fabric

et voila! A far more wearable, super cute top. I love to rock the nautical look with a little twist and wear with jean shorts or go a little bit more glam with white skinny jeans and a belted cardigan. All done in less than half an hour with just enough time to pop on a fake knotted belt, my new crocheted fedora hat and take a few silly snap shots outside (before the sun completely disappeared!)

How do you wear your stripes?

Lisa x

{Tutorial photos by Lisa Pocklington, 'snap-shot-not' photos by Jeremy Wilson}

International Yarn Bombing Day 11th June: Yarn Graffiti in Chamonix Mont Blanc


I'm generally not one for breaking the rules...  I get a sweat on just driving the wrong way down a lane in the carpark; and so agreeing to add some yarn graffiti to a piece of public property might be classed as a little out of character for me!

I have been following the slightly crazy world of Yarn Bombing for about a year now - if you have no idea what I'm talking about, just try Google-ing (is that officially a verb now?) yarn bombing or yarn graffiti and then look at the images tab. Cool huh?

In a nutshell, Yarn Bombing is a growing pastime whereby knitters and crocheters add some kind of yarn creation to public property.. a statue, a road sign, a park bench etc. Sometimes it is done in broad daylight, sometimes they leave their name and sometimes it is a stealth and mysterious, under-the-cover-of-darkness operation. Yarn Bombers can be individuals making a statement or groups of stitchers sharing some colourful yarn love with the world. However it's done, it's done for fun

Vintage and modern  Ete / Hiver posters for Chamonix by Henry Reb and Charlie Adam

2011 was the first official year for International Yarn Bombing Day - 11th June - and I was keen to get involved, in fact I began scouring the town for possible sites awhile back. Inspiration struck at the 11th hour though which didn't leave me long to plan my attack. I decided to create a frame around the Chamonix Mont Blanc road sign in the style of the tourist posters which promote the town for both summer and winter activities. Snowflakes on the upper right corner and flowers on the bottom left


This was a perfect opportunity to encourage my Get Hooked! crochet workshop students to try their hand at these motifs and practice working in the round, changing colour and using a variety of stitches. They did me proud! (thanks girls!) And although most were unable to join me to crochet on the day, they did pop along for support which was hugely appreciated.


And so with a bag of yarn, a few tasty snacks and my rain mac (the weather was so ominous all day!) I set up camp down by the lake and set to work making the frame from which to support the flower and snowflake motifs... all 4 metres of it! I managed 3 metres in the couple of hours we were there and collected a bunch of brightly crocheted flowers from the girls. The rest would have to be assembled at home.... it was wine-o'clock on a bank holiday weekend afterall!


I set out on a dawn raid alone this morning (with my trusty, if a little sleepy, photographer of course!) and teetered on a wobbly step ladder to fix the work in place. It took about 45mins but thankfully with minimal furtive glances from the passers by (actually I think they may have been more distracted by the photographer on crutches... an excellent ploy should ever you require a decoy for your yarn bombing activity by the way!)


 I'm pleased with the overall effect but could certainly do with a better/less easy to remove method of application for the framework. Anyway, I hope it brings a smile to the face of all who see it on their way into Chamonix town - locals and tourists alike. I hope it features in people's holiday photos, gets posted on Google Maps and most of all reflects the joy of creating something with an age old skill and totally by hand. I wonder how long it will remain in place?

So how do I feel after my first foray into the furtive world of yarn bombing? I will certainly be planning more - but they will be a little more Andy Goldsworthy than Banksy in terms of approach. And do I feel like a crochet guerrilla? hmmm, possibly more like a cheeky monkey!

You can learn more about Yarn Bombing on the blogFacebook page and Flickr Gallery or join the group on Ravelry

Enjoy the yarn love! And you can view the entire event in photos on my Get Smitten Flickr Gallery


Lisa x

{photos by the remarkably patient and rather handsome Jeremy Wilson}

p.s If you are reading this via email subscription and cannot see any images or the slideshow, please come on over to the actual blog, it's worth a peek! Thanks x

Wednesday 8 June 2011

Bon Appétit: Coq au Vin


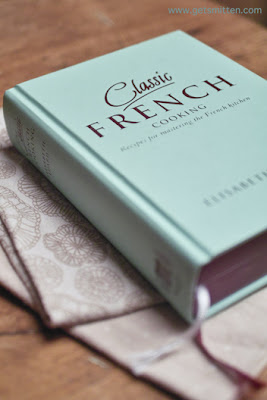
My wonderful friend Helen bought this book for me when I left England to live in France.. she always picks out gifts that I totally love. It matches my Nigella Lawson kitchen bits and bobs so I had visions of it sitting elegantly on my chic kitchen shelf, just a reach away for when I had the urge to create a French culinary masterpiece....

...fast forward to real time and this little treasure has been packed away in storage for the last few years. The house took longer than planned to renovate and said chic kitchen went through various stages of not looking very chic at all. In its finished state it is rather gorgeous but the shelf I dreamed of is not quite big enough to house cookery books & instead boasts a couple of Alessi coffee makers and vintage tins

Finally I found the perfect excuse to pull out the book yesterday as we have friends staying for a few days. They had taken a couple of days to drive out from England and so I decided that a hearty but simple French meal was in order for their arrival. Something that would improve the longer it sat on the stove and that could be mopped up with hunks of fresh bread. I decided to serve up artichokes with lashings of butter & cracked pepper, followed by Coq au Vin


I've always had a 'thing' about the beauty of books and so I didn't have it in me to open the book wide and crease the spine; instead I delicately peeked inside and extracted the recipe bit by bit. Its a surprisingly easy dish to make... one that makes it look as though you've put alot more effort in that you actually did. Plus, it tastes delicious!

Coq au Vin for 4 people
  • 1kg of free range chicken, in large chunks or jointed
  • 100g of streaky bacon, diced
  • 500g shallots, peeled but whole
  • 250g button or chestnut mushrooms
  • 2 tbsp brandy
  • 3 garlic cloves, chopped or crushed
  • 1 bottle of robust French red wine
  • small bunch of thyme, parsley and bay leaves
  • 1tbsp of unsalted butter
1  In half of the butter, fry the bacon, shallots and mushrooms until lightly brown. Set aside

2 In the remaining butter, fry the chicken until they take a little colour, then sprinkle on the brandy and set alight to burn off the alcohol

3 Add the cooked bacon, shallots and mushrooms along with the garlic, wine and herbs. Bring to the boil, then reduce the heat, cover and simmer for 1 - 1.5 hours

4 Mix a small amount of butter and flour to make a paste, then slowly add to the sauce to thicken it slightly. Bubble up the sauce until slightly glossy

5 Serve with green beans, boiled potatoes and hunks of fresh bread to mop up the juices!

The book is sprinkled with sweet illustrations throughout.. perhaps I'll share them with you another time

Bon appétit!

Lisa x

p.s  the other great thing about having guests.... is that the house is remarkably tidy!

Share this post with your friends!

Related Posts with Thumbnails